How to automatically push Microsoft 365 GAL (global address list) to personal user mailboxes and mobile devices?
Maintaining seamless access to all contacts is crucial for efficient email communication and productivity on mobile devices. However, organizations that rely on Microsoft Office 365 as their office suite often face the inconvenience of not being able to access their organization contacts on their mobile devices, even with Outlook contacts integrated into iPhone or Android.
In this blog post, we want to present a straightforward solution to this problem offered by SyncPenguin. Our service enables you to effortlessly establish an automatic continuous one-way sync between the Office 365 GAL (global address list) and individual user mailbox contact lists, thereby granting users access to these contacts on their respective devices.
By leveraging SyncPenguin, organizations can streamline their workflows and enhance productivity by ensuring that crucial contact information is readily available, enabling seamless communication across platforms. Say goodbye to the frustration of limited contact accessibility, and embrace the convenience and efficiency provided by our Office 365 GAL sync solution!
Note that our Office 365 GAL connector syncs both tenant user information, as well as global organizational contacts. Below we provide all the necessary steps required to configure and start such synchronization.
If you want to sync contacts from a public O365 folder to users, please check this blog post instead. If you are looking for a different sync configuration, please feel free to contact us to discuss the details of your use case.
Setting up the sync
The first step is to create a SyncPenguin dashboard account at https://dashboard.syncpenguin.com (we provide a fully free 14-day trial without a credit card or any commitment).
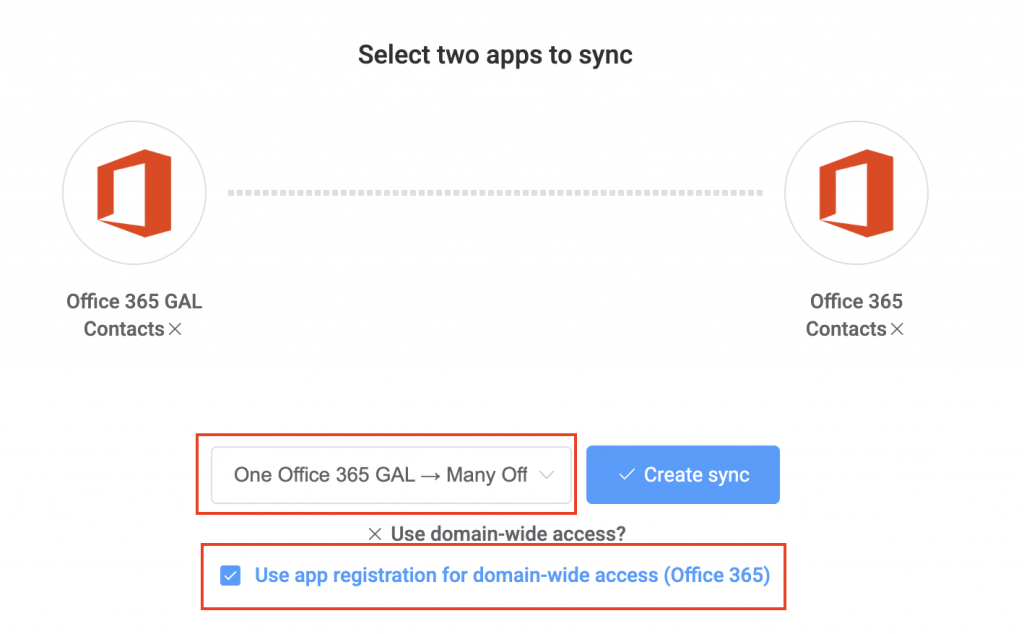
Once you are signed in, head to the Synchronizations section (left menu) and click + New sync. Select Office 365 GAL Contacts as the first app and regular Office 365 Contacts as the second app. Then, select one-to-many sync direction One Office 365 GAL → Many Office 365. To simplify the setup process for multiple destination users, we recommend selecting the domain-wide access option, as shown below. If not selected, each sync destination user would have to be connected separately.
Once you create the sync, you’ll see the main sync page:
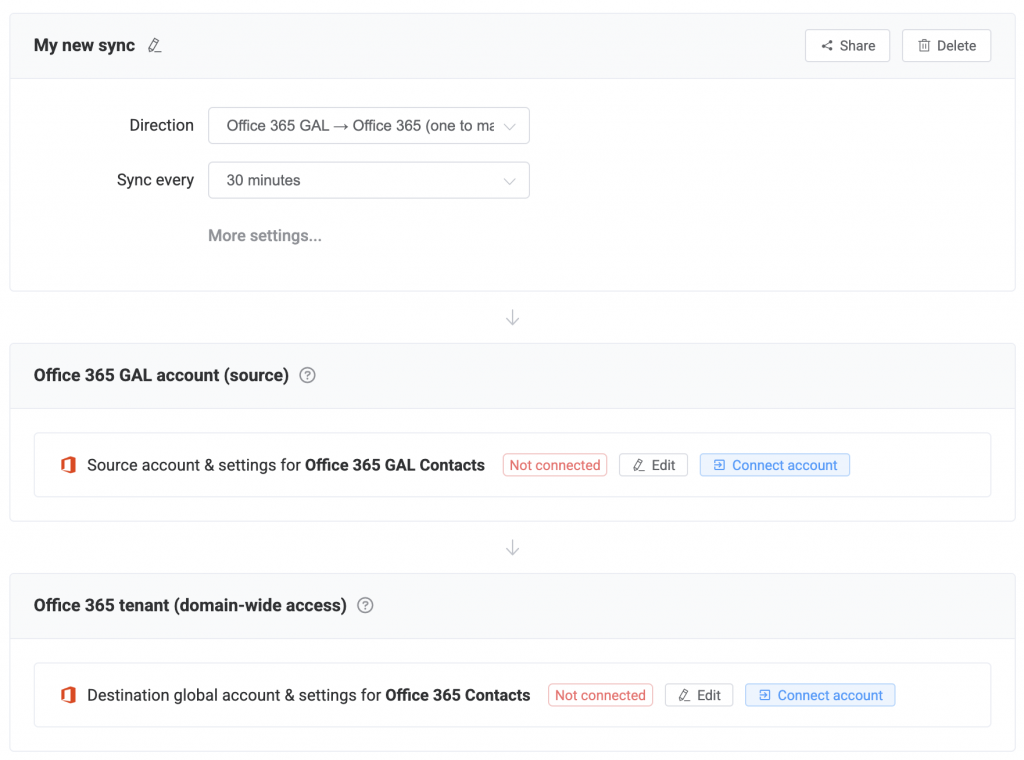
Connecting GAL
Source GAL should be connected in the source section of the sync page. Click Edit, and connect your Office 365 account by clicking the CONNECT button. Note that the connected account must have admin user management permissions in order for us to gain read-only access to the GAL. You can also connect to the GAL as an app by providing Entra ID app registration details (to see more details, click How to connect?).
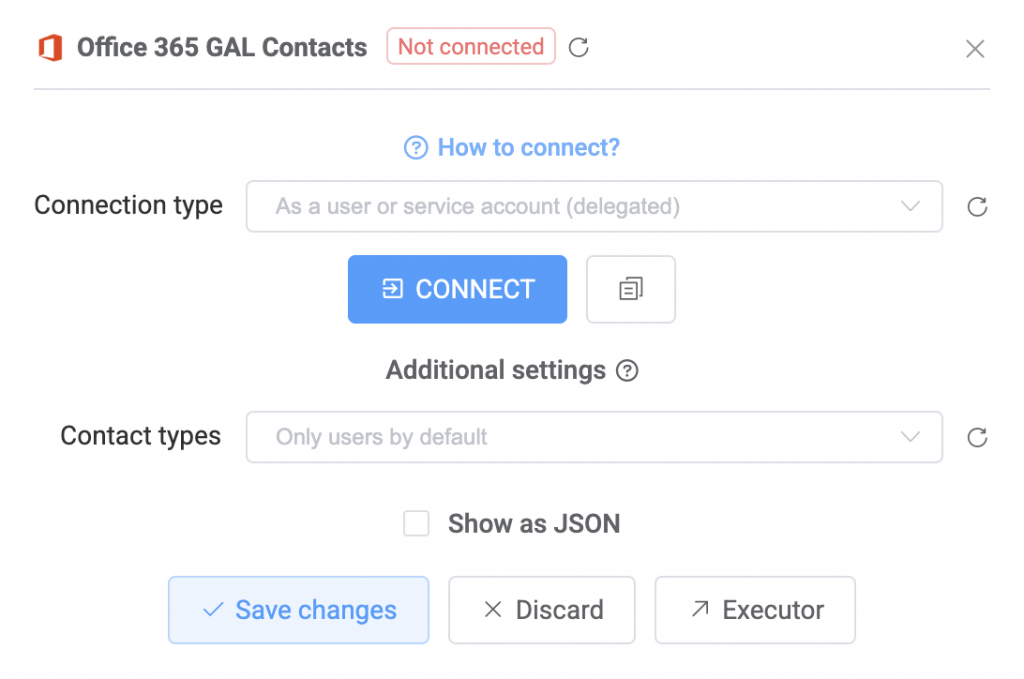
If everything is connected correctly and without issues, you’ll see a green Connected tag.
Connecting tenant users
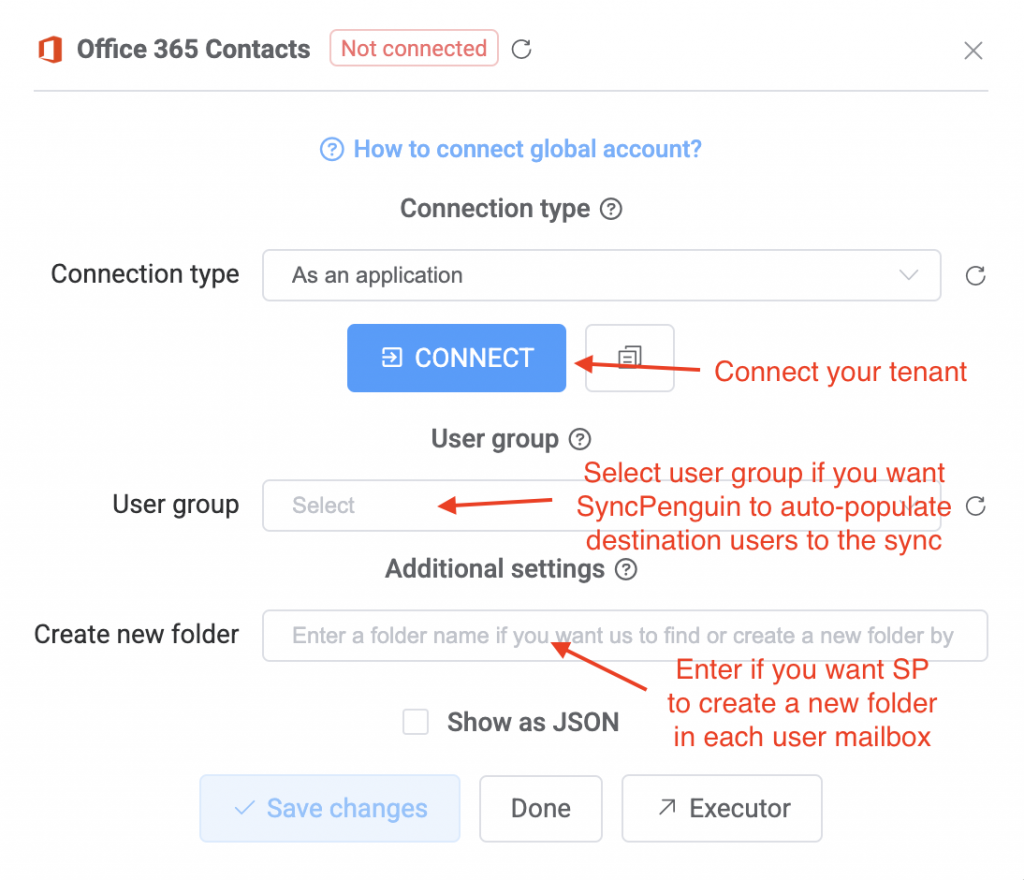
To connect individual destination user accounts, we use Entra ID app registration for domain-wide access. To connect, click the Edit button in the Domain-wide access section of the sync page. Then, click the CONNECT button and follow the connection steps. If connected well, you will be redirected back to SyncPenguin and see a green Connected label. Note that it might take a few minutes for the permissions to propagate.
Additionally, you can select User group if you want SyncPenguin to add destination users to the sync automatically using the auto-populating feature. We recommend initially testing the sync on a few manually added destination users and then proceeding with all/rest of the users after you verify everything works as expected.
Lastly, you can also specify Create new folder field value if you want SyncPenguin to automatically select or create a contact folder during syncing (if not provided, the contacts will be synced to the primary contacts folder of each user).
Adding destination users to the sync
Once the source (GAL) and destination (tenant) accounts are connected, you are good to add individual users to the sync. Those are the users that will have the GAL synced to their personal contact folder. To add a user, click the plus icon in the Individual sync profiles section, followed by Add manually. Then enter the user name (in any format), as well as a valid email address in O365.
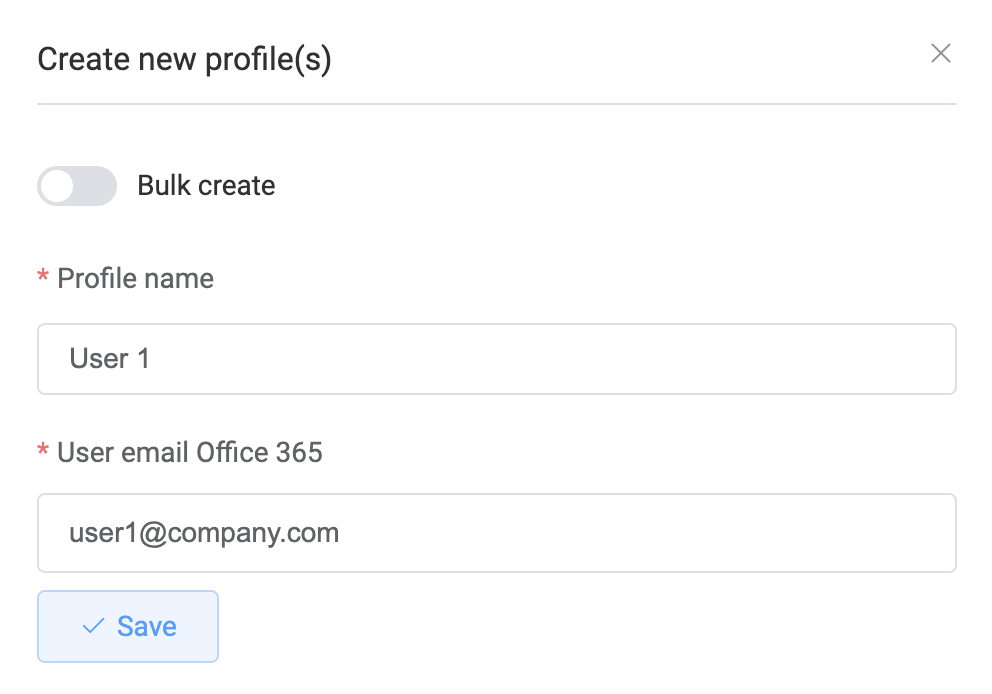
Note that you can also add users in bulk. You can also add users through a CSV import or bind users to an O365 user group to auto-populate in SyncPenguin (as described previously). Feel free to contact us in case of any questions or issues with the user setup.
Starting the syncing process
Once the user is added, you can start syncing. For that, in the corresponding user row, click the blue Actions button followed by the Start syncing button and select the initial sync option (merge or full copy). Once selected, click the Merge and start button at the bottom:
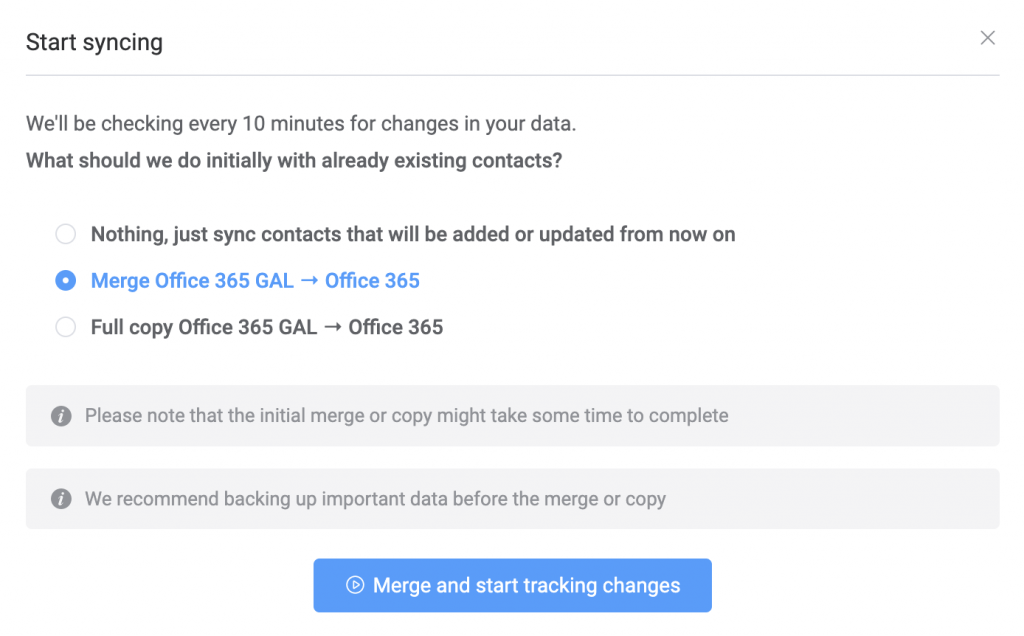
This will start the initial contact sync, after which we’ll be automatically watching GAL contacts for changes and applying them to all added and started users.
That’s it
That concludes our short blog post about configuring and starting Office 365 GAL sync to tenant users. If you have any questions or issues, please feel free to contact us through the chat or email [email protected].