On syncing user calendars between Microsoft 365 and Google Workspace (updated in 2025)
Microsoft 365, formerly known as Office 365, and Google Workspace are widely recognized office suites catering to businesses of all sizes. While each has its own advantages and disadvantages, this article aims to address a specific scenario where organizations or teams may need to utilize both solutions simultaneously (for example, after a company merger or acquisition). Managing emails from multiple mailboxes is relatively straightforward, but when it comes to synchronizing calendars and meetings between Outlook and Gmail, avoiding double-bookings and maintaining an organized calendar can become challenging.
To tackle this issue, SyncPenguin offers a practical solution. Our service enables seamless and near-instant two-way synchronization of calendar bookings between Microsoft 365 and Google Workspace, supporting multiple users. In this blog post, we will guide you through the step-by-step process of setting up this synchronization to ensure smooth syncing of schedules across both platforms.
Create the sync in SyncPenguin Dashboard
All synchronizations are managed from our cloud dashboard: https://dashboard.syncpenguin.com/. You can create a free account and start the 14-day trial at any time.
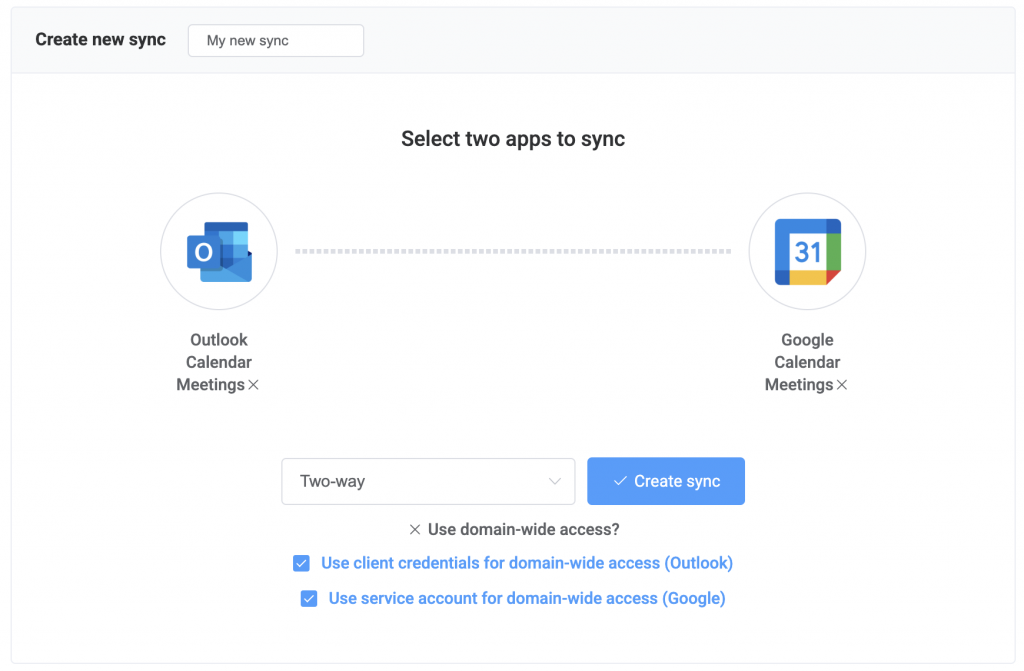
To set up a Microsoft and Google calendar sync, head to the “Synchronizations” section of the left menu and click “+ New sync”. Then, select Outlook Calendar Meetings as the first service to sync, and Google Calendar Meetings as the second. After that, select the syncing direction, which in our case is “Two-way“.
If you plan to sync more than a few users, we strongly suggest creating the sync with domain-wide access configuration. This will greatly simplify the setup process, as each individual user does not have to be manually and explicitly connected to the service. To indicate that your sync will be connected through domain-wide access, click “Use domain-wide access?” and then enable both client credentials access for Outlook and service account access for Google, as shown below.
Then, click the “Create sync” button.
Once the sync is created, you’ll see the main sync page with the following sections:
- Sync settings. Basic sync settings like name, direction, sync interval, etc.
- Domain-wide access. Used to connect both Google Workspace and M365 tenants with domain-wide access.
- Individual sync profiles. Here you’ll add actual users to the sync.
- Field mapping & rules. In this section, you can customize how meetings are synced and mapped between M365 and Google.
- Sync history. In this section, you’ll see how updates you make to the calendar meetings are tracked and applied to the calendar in the opposite tenant.
Let’s first connect both domain-wide access accounts.
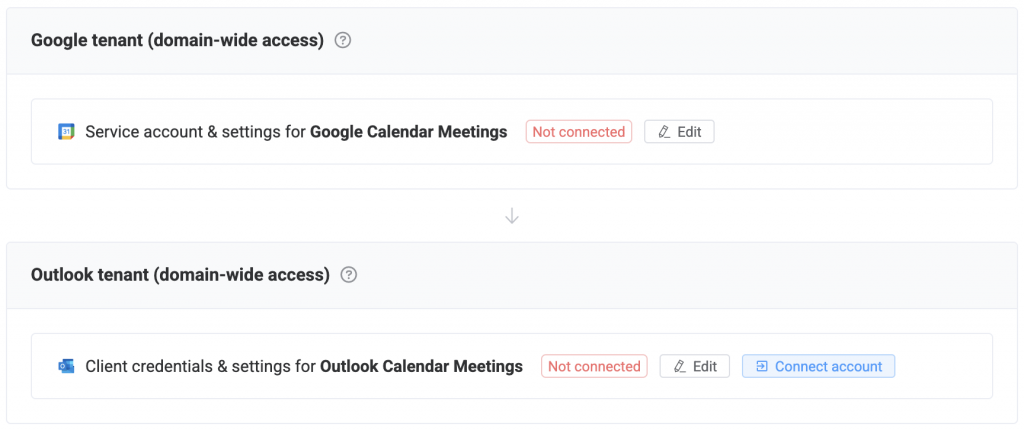
Connect Google Workspace (service account)
To obtain access to Google Workspace user calendars, SyncPenguin uses Google service account. This is a special account that can be created by an admin and used by server-side applications to do (limited) work on behalf of the organization or users through the official Google APIs. You can click on “Service account”, and then “How to connect service account?” to see the full instructions on how to create a service account, grant domain-wide access, and connect it to SyncPenguin.
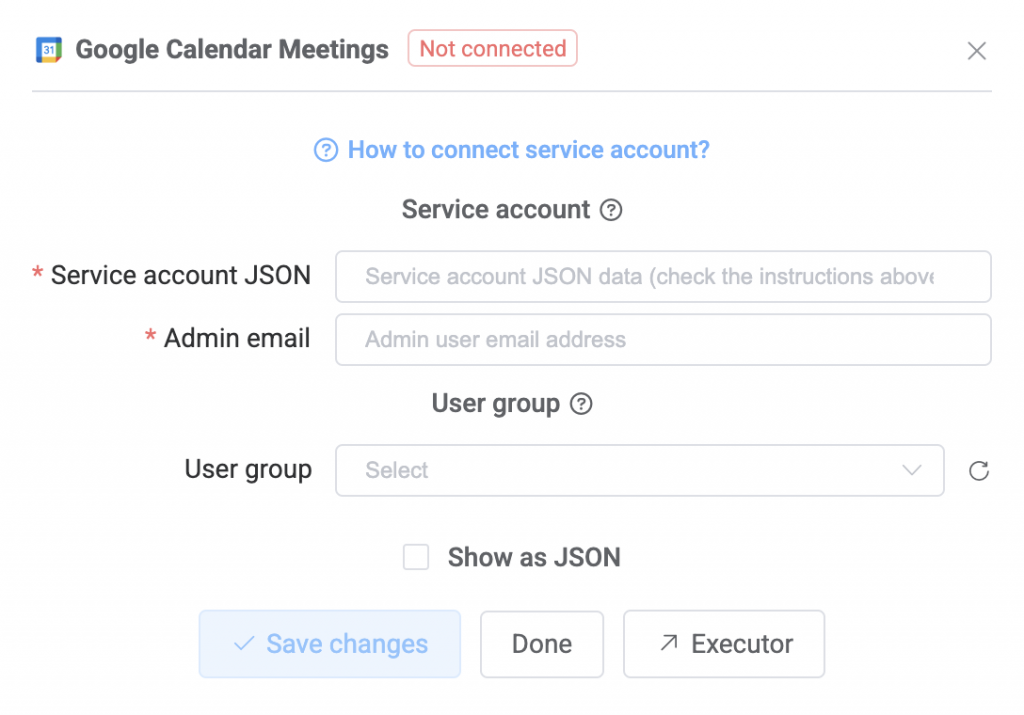
A properly connected service account will be marked with a green “Connected” tag on the sync page.
Connect Microsoft 365 (app registration)
To get domain-wide access to Microsoft 365 users, SyncPenguin uses an app registration, for which an admin account must authorize access to your tenant. You can either connect the default SyncPenguin app, or create your own app registration. To connect the SyncPenguin app, click on “Client credentials”, and then the “CONNECT” button to authorize the access. Note that it might take a couple of minutes for the permissions to propagate.
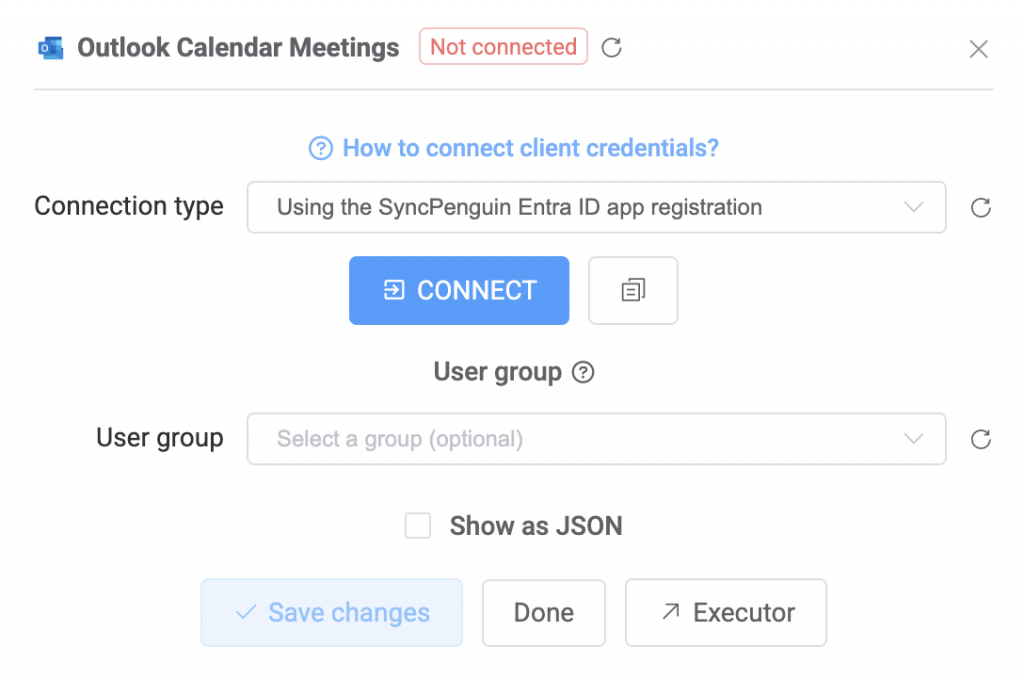
A properly connected app will be marked with a green “Connected” tag.
Once both domain-wide access accounts are connected, you can proceed with adding users to the sync.
Add users to the sync
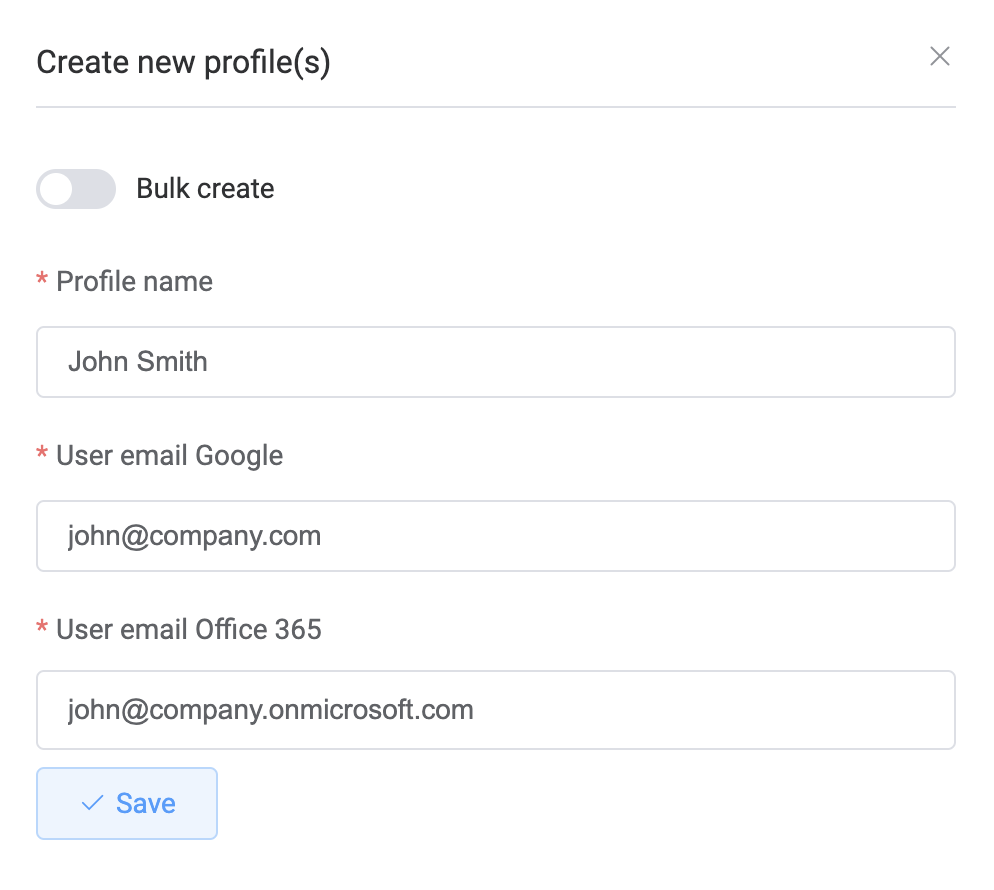
Note that SyncPenguin is not syncing all users by default. Instead, you need to explicitly add users to the sync and start syncing for them. You can add users one by one or in bulk. To add a single user, click the plus icon in the “Individual sync profiles” section, followed to “Add manually”. Then, enter user name (in any format), followed by the valid and full email address in both Google and M365 tenants, as shown below.
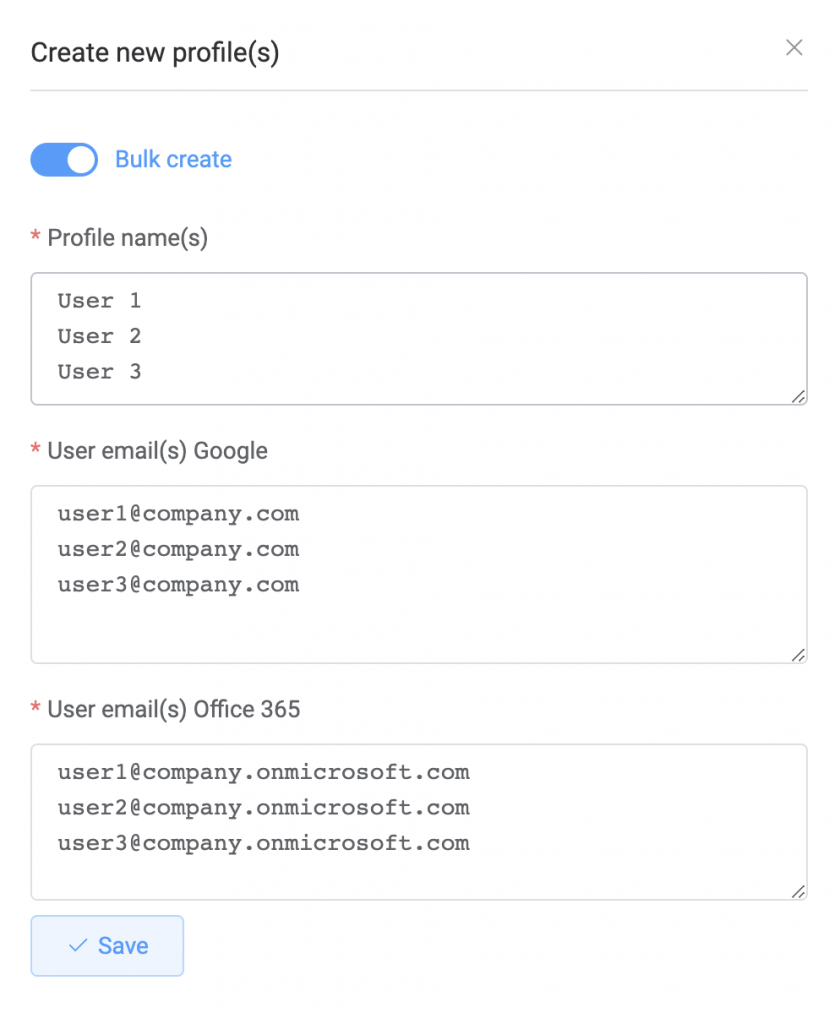
To add users in bulk, enable “Bulk create” option when creating sync profile and enter sync profile names and emails in separate lines as shown below.
You can also add users through a CSV import, or bind users to M365 and Google user groups to auto-populate and add to SyncPenguin. Feel free to contact us in case of any questions or issues with the user setup.
Start syncing
Once users are added, you are ready to start syncing. This can be done for each user individually, or in bulk by selecting users to start using checkboxes on the left, then clicking “Bulk actions” → “Start syncing”.
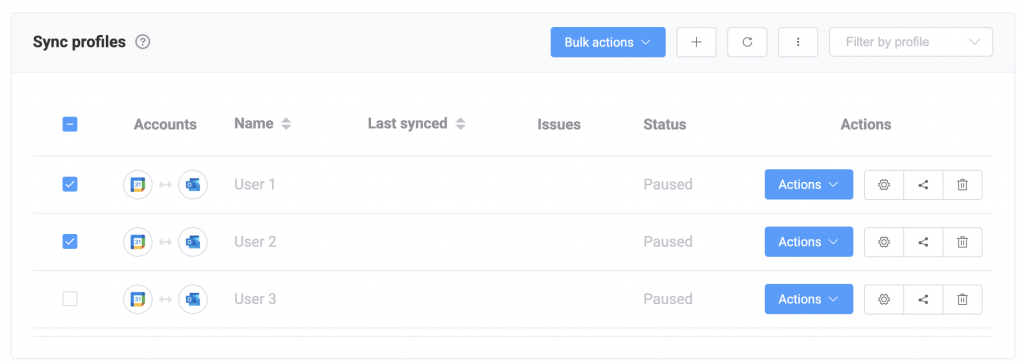
When starting syncing you will be prompted with whether you want us to merge existing meeting data or not. In most common case, just select “Merge all existing meetings two-way” and click “Merge and start tracking changes”. Once the initial merge is completed, SyncPenguin will be automatically watching both calendars (for each started user) for changes and syncing them accordingly between Google and M365. Any issues found while syncing will be marked red and shown in the Sync history section at the bottom of the sync page.
Conclusion
Thanks for reading! We hope you find this article helpful when looking for a reliable, quick, and affordable way to automatically sync calendars between Google and Microsoft 365 organizations.
Looking for a M365 sync solution?
SyncPenguin is a universal two-way syncing platform that supports a variety of M365 and Google syncing use cases, including syncing between multiple tenants, one-to-many and many-to-one syncing, and more. Feel free to contact us to describe your use case, and we’ll try to help.