Office 365 Calendar Meeting Sync Between Organizations or Tenants
Managing meeting bookings and ensuring there are no scheduling conflicts can be a daunting task when employees in your organization have active work accounts across different Office 365 tenants. To address this challenge and simplify calendar management, SyncPenguin offers a reliable and efficient solution — a two-way synchronization that keeps calendars up-to-date with a seamless and automatic setup.
In this blog post, we will delve into the process of setting up this synchronization between two Office 365 tenants, accommodating one or multiple users. Please note that this setup requires admin access on both tenants and is considered more advanced compared to a simple sync between two calendars, which we have extensively detailed here.
Domain-wide access
If you want to be able to sync on behalf of your tenant users (without having each of them manually connecting their accounts) while keeping the setup process as simple as possible, we recommend using the domain-wide access sync option that we provide at the sync creation. The domain-wide access is achieved through an app registration that is authorized to access user calendars. You can either authorize the default SyncPenguin app or create your own app registration in Entra ID. We will explain this in more detail later in the blog post.
Creating the sync
All SyncPenguin syncs are managed in our cloud dashboard. If you don’t have an account, feel free to sign up for a 14-day free trial.
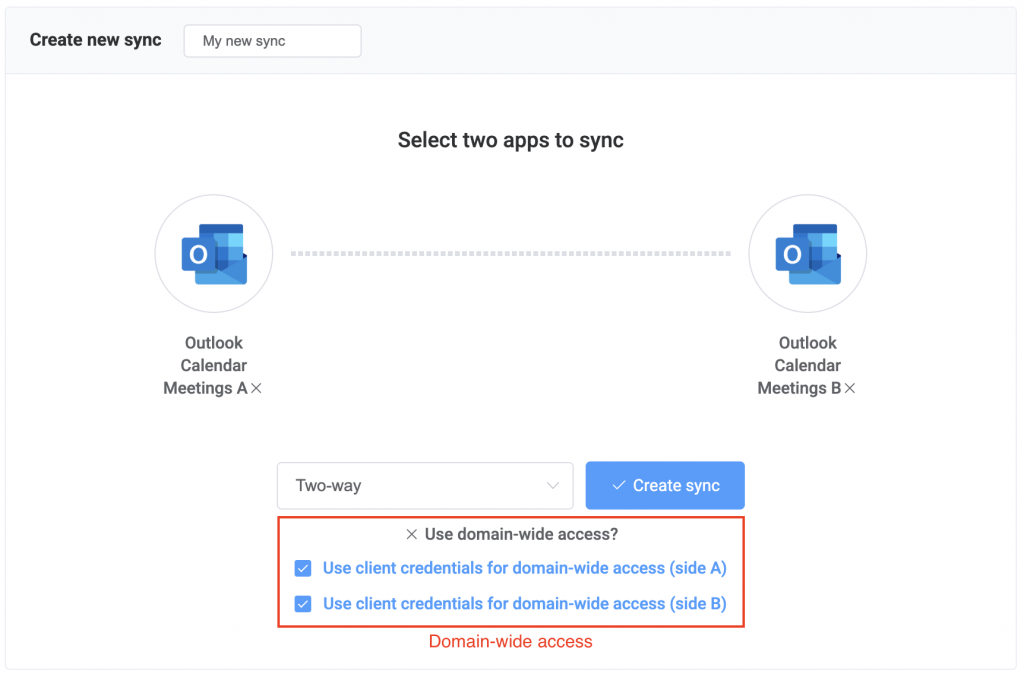
The first step is to create a sync in the SyncPenguin dashboard. For this, on the left menu select “Synchronizations” , and then click the “+ New sync” button. Then, select Outlook Calendar Meetings as both synced apps, the two-way sync direction, and also click on “Use domain-wide access?” and enable it for both synced apps, as shown below.
Note that we also provide a connector named Office 365 Calendar Meetings, but as of today we recommend choosing the Outlook connector as it internally uses newer Microsoft APIs, provides improved performance and near-instant syncing using webhooks.
Authorize domain-wide access
Once you have the sync created, the next step is to connect and authorize domain-wide access to both synced tenants (named A and B for simplicity). This is done in the domain-wide access sections of the sync page, as shown below. To connect a tenant, click the “Connect account” button and follow the authorization process. This process authorizes SyncPenguin app to obtain access to user calendars of your tenant. Note that the access can be limited to only a certain set of users if required.
If you prefer connecting your own Entra ID app registration, click the “Edit” button instead, then change the connection method and follow the steps explained in the “How to connect client credentials?” section.
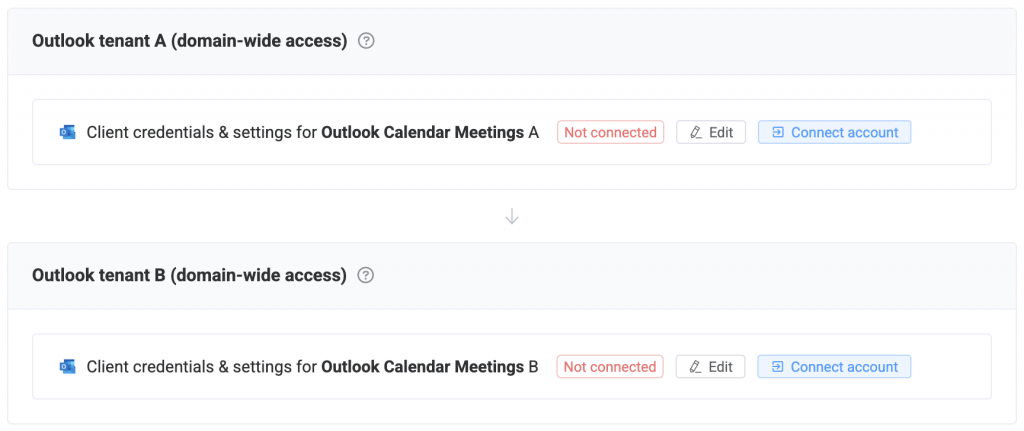
If the tenant is correctly connected, you should see a green “Connected” label. Note that permissions might take a few minutes to propagate.
Once the tenants are connected, you can start adding users to the sync.
Add users
To add a single user, click the plus icon in the “Individual sync profiles” section of the sync page, and select “Add manually”. You’ll then need to provide a name (in any format), followed by user emails in the two corresponding tenants, as shown below.

Note: You can also select the “Bulk create” option and add multiple users at once. Additionally, you can add users through a CSV import, or bind the user list to a user group in both O365 tenants to auto-populate them in SyncPenguin and automatically maintain the list of synced user. Feel free to contact us if you require any help or have issues or questions during user setup.
We recommend starting with one or two manually added test users and then expanding from there.
Start syncing
Once you have added a user, click the “Actions” button followed by “Start syncing” to begin the calendar sync process for the corresponding user.
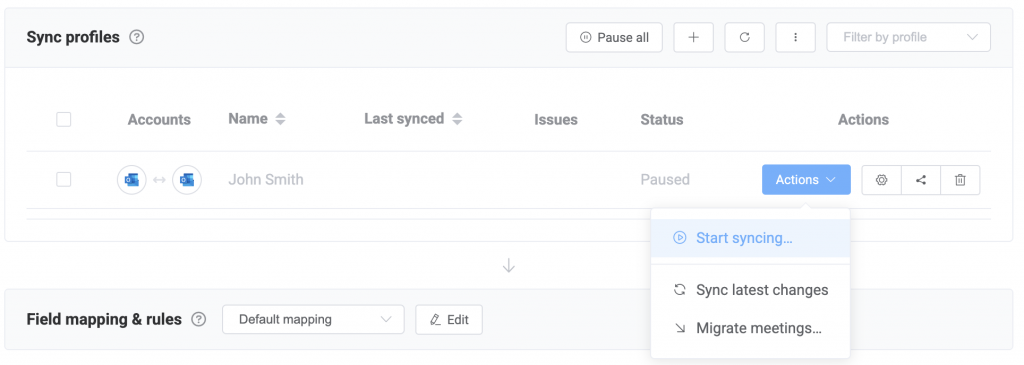
You’ll be prompted with a choice to either sync only new meetings or to merge existing calendar meetings two-way. Note that the sync never processes meetings older than a month, and there is no limit on future meetings. Select your preferred option and click “Start”.

That is it! The sync will start working automatically in the background, and you’ll be able to check sync logs in the “Sync history” section of the sync page.
Note: Like adding users, you are also able to start/pause syncing in bulk for multiple users at once. To do so, select the corresponding rows using checkboxes on the left side of the user table, and click the “Bulk actions” → “Start syncing” button.
Customizations
A great feature of SyncPenguin is the ability to customize your sync.
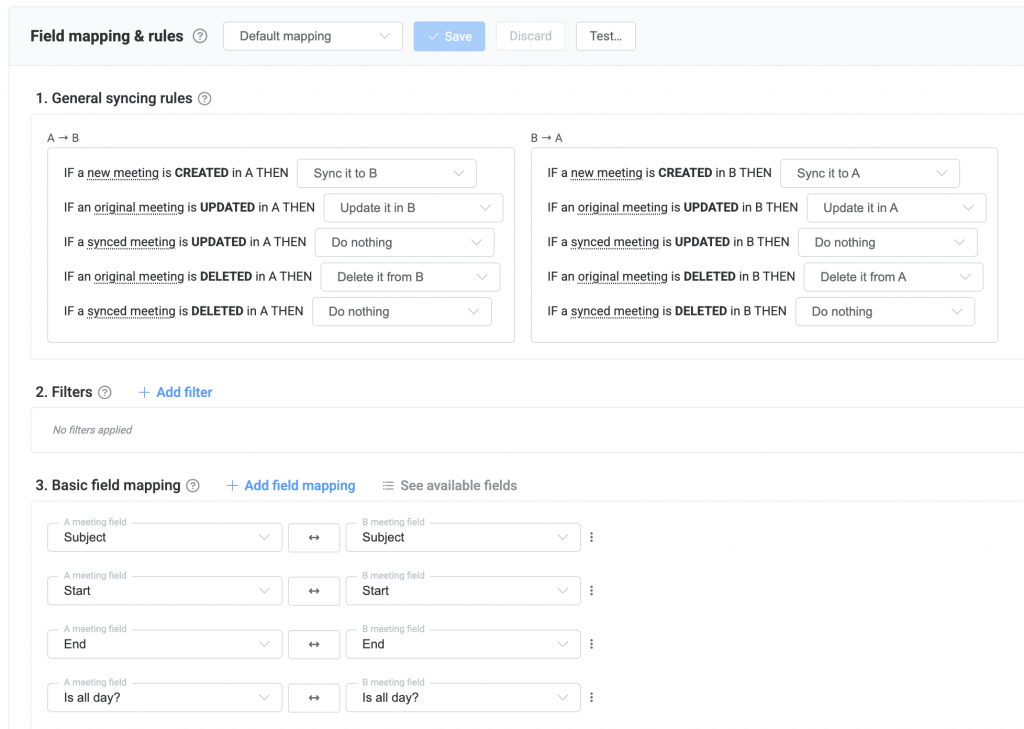
For calendar synchronizations, we provide a few pre-built field mappings that match popular use cases. Namely, you can choose between syncing full meeting details or blocking the time slots in the other calendar without sharing any specific meeting details. You can choose one of the field mappings, or build your own, in the “Field mapping & rules” section of the sync page.
In conclusion
Thanks for reading! We hope this blog post was helpful and guided you through the process of setting up a calendar sync between two Microsoft 365 tenants. If you want to check out a similar article on how to sync from a single source to multiple destinations, read our Office 365 one-to-many contact sync blog post here.
Looking for an Office 365 sync solution?
Perhaps we can help. SyncPenguin is a universal two-way sync SaaS solution that covers a lot of use cases related to Microsoft Office 365 data integration. Feel free to contact us to discuss your use case.