Syncing Office 365 Contacts From a Public Folder to User Mailbox Folders (One-to-Many Sync)
In this article, we’ll explain how you can easily use SyncPenguin to establish an automatic, one-way sync of contacts from a single Microsoft Office 365 source folder (public folder or shared mailbox) to multiple (or all) destination users of the same or different tenant. Please note that the same instructions apply when syncing Office 365, Exchange on-premises, or a combination of those.
Create a one-to-many sync with domain-wide access
In order to set up the sync, you need access to the SyncPenguin dashboard. If you don’t have an account yet, you can sign up here.
The first step is to create a new sync. For that, click “Synchronizations” on the left menu of the dashboard. Then, click “+ New sync” and select Office 365 Contacts twice (or Exchange on-premises) as the two synced apps. In the dropdown below, set the direction to “One → Many”. In order to simplify the sync setup for the destination users, we recommend selecting domain-wide access setup option, as shown below.
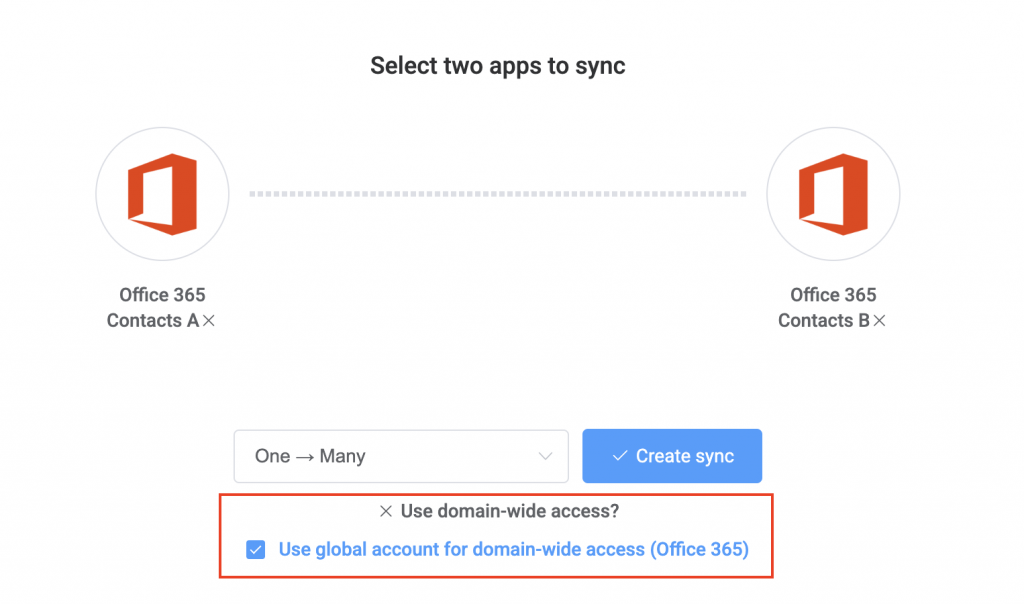
Then, click “Create sync”, and you’ll see the main sync page.
The next step is to connect and authorize access for the sync source and destination domain-wide access. They are both represented in the corresponding sections of the sync page, as shown below.
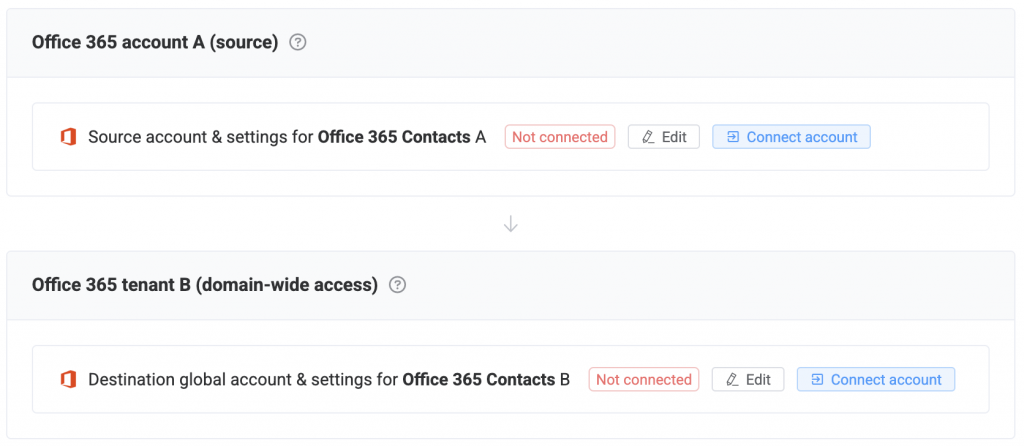
Connecting the source
To connect the sync source, click “Edit” near the “Source” account, followed by the “CONNECT” button. You need to connect an account that has access to the source public folder. Once connected, you can also choose which Office 365 contact folder is the syncing source (public folders will also be listed there).
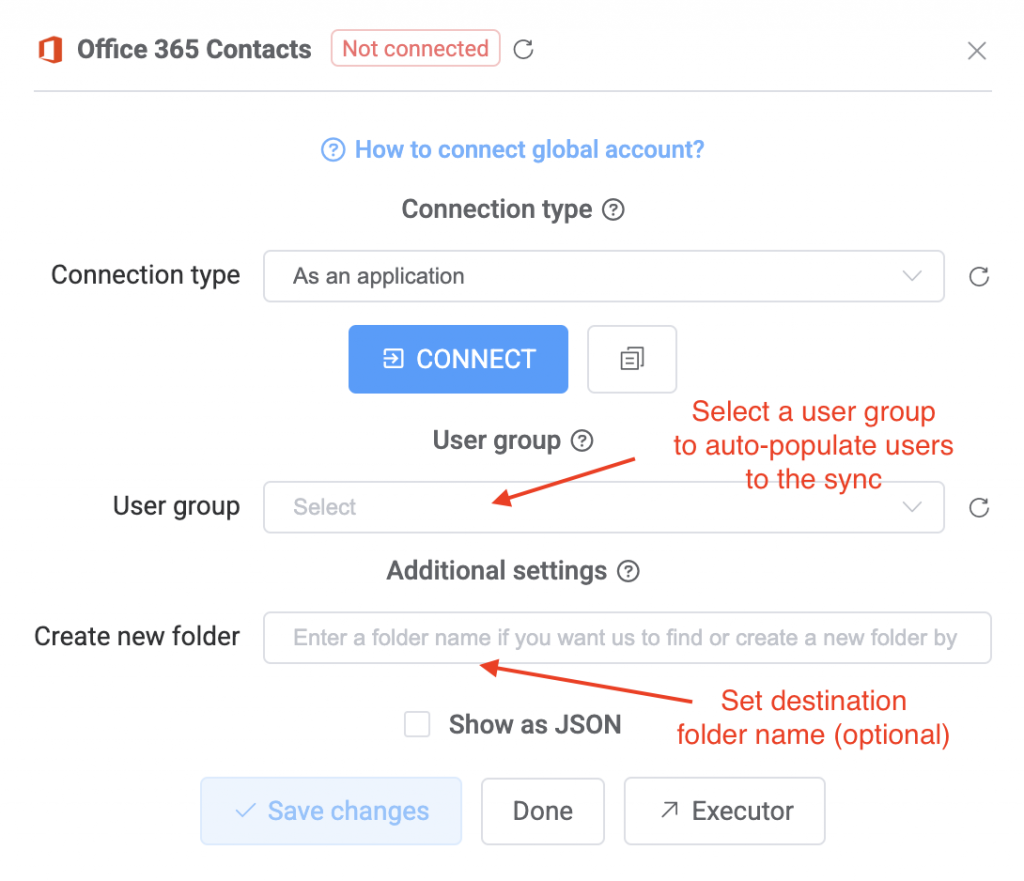
If you want to sync contacts of a shared mailbox instead, you just need to specify the shared mailbox email address in the “Shared mailbox” field and click “Save changes”.
Connecting the destination
The destination domain-wide access is connected using an Entra ID app registration that is authorized to access tenant user mailbox contacts. To authorize the access, click “Edit”, then click the “CONNECT” button and follow the authorization steps. If everything connects well, you should see a green “Connected” label in SyncPenguin. Note that permissions can take a few minutes to propagate.
You can also select a user group to automatically sync to (more about that in the next section).
Additionally, you can specify the name of the contact folder to sync to. The sync will try to find a folder with this name or create it if not found. If you don’t specify the folder name, it will sync contacts to the default primary contacts folder for each user.
Add users to the sync
The next step is to add actual destination users to sync to. There are three options here:
- Add one or multiple users manually by entering their email addresses (recommended for initial testing).
- Import a destination user list through CSV.
- Auto-populate users based on the selected “User group” (see previous section).
The destination users are managed in the “Individual sync profiles” section of the sync page. To add a destination user, click the “+” icon, select “Add manually”, and enter a user name (in any format), as well as a full and valid user email (at the destination tenant).
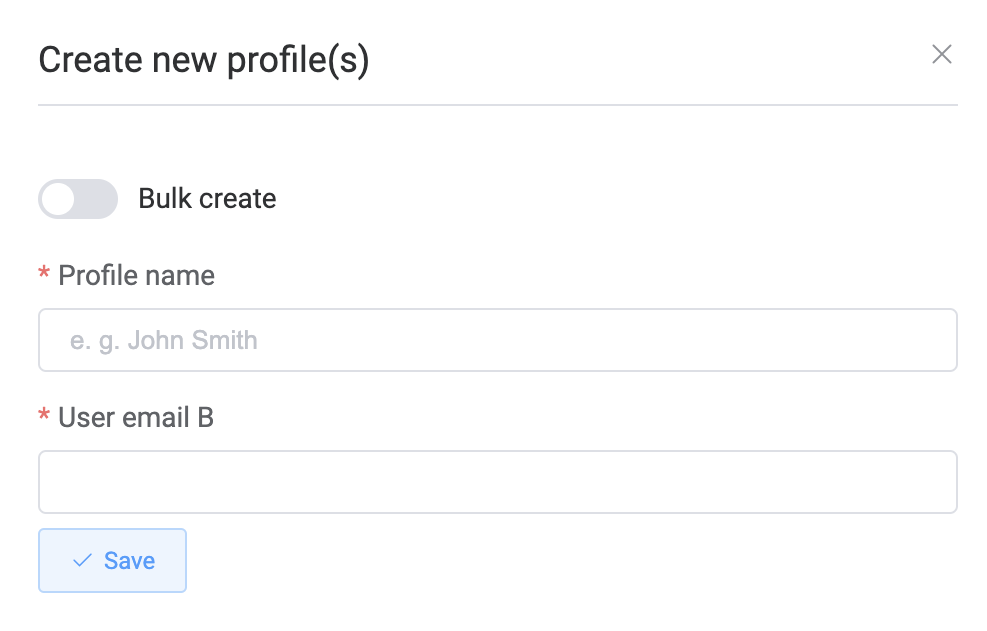
You can add users one by one, or select the “Bulk create” option and add multiple users at once. You’ll need to specify all user names and corresponding emails in separate lines, as shown below.

To import users from a CSV file, you can click the “+” icon followed by “Import from CSV”. To see the format of CSV, you can export sync profiles first by clicking the “⋮” icon followed by “Export sync profiles to CSV”. A CSV in the same format can then be uploaded for importing.
To auto-populate users based on an Office 365 user group, first of all you need to select the group during the destination domain-wide access account setup (see previous section). Once selected, you can click the “+” icon, followed by “Populate”. All users in the selected group should automatically be added to the sync. You can also enable periodic auto-refresh of the user list by clicking the “⋮” icon, then “Enable auto-populating”.
Starting sync
Once users are added, you are good to start the sync. To start the sync for one user, click the “Actions” button in the user row, then “Start syncing”. To start the sync for multiple users at once, select all of them (using checkboxes) and click “Bulk actions” → “Start syncing”.
Once you click the “Start” button, you will be prompted about what should be initially done with the source folder contacts. If you want to sync all source contacts to the destination users, select the “Merge A → B” option, which will ensure that the destination user folder contains all source contacts.
Note that it’s OK if the user folder contains some of the source contacts before the merge; the sync will not create duplicates. However, if the user folder contains additional contacts (not present at the source) before the merge, these contacts will not be removed by the merge process. It is recommended to merge contacts to an empty destination folder if possible.
Once the sync begins, you’ll see its status in the “Sync history” section at the bottom of the sync page.
Conclusions
This is how simple it is to use SyncPenguin to configure and start an automatic one-way sync of a Microsoft Office 365 public contact folder to all or some tenant users in your organization. If you have any feedback or questions, feel free to contact us any time.